 notepad
![[articles]](https://eev.ee/theme/images/category-articles.png)
Welcome to part 1 of this narrative series about writing a complete video game from scratch, using the PICO-8. This is actually the second part, because in this house (unlike Lua) we index from 0, so if you’re new here you may want to consult the introductory stuff and table of contents in part zero.
If you’ve been following along, welcome back, and let’s dive right in!
Recap and short-term plans
So far, I have… this. Which is something, and certainly much more than nothing, but all told not a lot.
Most conspicuously, this is going to be a platformer, so I need gravity. The problem with gravity is that it means things are always moving downwards, and if there’s nothing to stop them, they will continue off indefinitely into the void.
What I am trying to say here is that I feel the looming spectre of collision detection hanging over me. I’m going to need it, and I’m going to need it real soon.
And, hey, that sucks. Collision detection is a real big pain in the ass to write, so needing it this early is a hell of a big spike in the learning curve. Luckily for you, someone else has already written it: me!
Before I can get to that, though, I need to add some structure to the code I have so far. Everything I’ve written is designed to work for Star Anise and only Star Anise. That’s perfectly fine when he’s the only thing in the game, but I don’t expect he’ll stay alone for long! Collision detection in particular is a pretty major component of a platformer, so I definitely want to be able to reuse it for other things in the game. Also, collision detection is a big fucking hairy mess, so I definitely want to be able to shove it in a corner somewhere I’ll never have to look at it again.
A good start would be to build towards having a corner to shove it into.
Adding some structure
As of where I left off last time, my special _update() and _draw() functions are mostly full of code for updating and drawing Star Anise. That doesn’t really sit right with me; as the main entry points, they should be about updating and drawing the game itself. Star Anise is part of the game, but he isn’t the whole game. All that code that’s specific to him should be put off in a little box somewhere. Cats love to be in little boxes, you see.
This raises the question of how I want to structure this project in general. And, I note: structuring a software project is hard, and you only really get a good sense of how to do it from experience. I’m still not sure I have a good sense of how to do it. Hell, I’m not convinced anyone has a good sense of how to do it.
Thankfully, this is a game, so it’s pretty obvious how to break it into pieces. (The tradeoff is that everything in a game ends up entangled with everything else no matter how you structure it, alas.) Star Anise is a separate thing in the game, so he might as well be a separate thing in the code. Later on I’ll need some more abstract structuring, but as an extremely rough guideline: if I can give it a name, it’s a good candidate to be made into a thing.
But what, exactly, is a thing in code? Most commonly (but not always), a thing is implemented with what’s called an object — a little bundle of data (what it is) with code (what it can do). I already have both of these parts for Star Anise: he has data like his position and which way he’s facing, and he has code for doing things like updating or drawing himself. A great first step would be to extract that stuff into an object, after which some other structure might reveal itself.
I do need to do one thing before I can turn get to that, though. You see, Lua is one of the few languages in common use today that doesn’t quite have built-in support for objects. Instead, it has all the building blocks you need to craft your own system for making objects. On the one hand, the way it does that is very slick and clever. On the other hand, it means you can’t write much Lua without cobbling together some arcane nonsense first, and also no one’s code quite works the same way.
Which brings me to the following magnificent monstrosity:
 1function nop(...) return ... end
 2
 3--------------------------------
 4-- simple object type
 5local obj = {init = nop}
 6obj.__index = obj
 7
 8function obj:__call(...)
 9    local o = setmetatable({}, self)
10    return o, o:init(...)
11end
12
13-- subclassing
14function obj:extend(proto)
15    proto = proto or {}
16
17    -- copy meta values, since lua doesn't walk the prototype chain to find them
18    for k, v in pairs(self) do
19        if sub(k, 1, 2) == "__" then
20            proto[k] = v
21        end
22    end
23
24    proto.__index = proto
25    proto.__super = self
26
27    return setmetatable(proto, self)
28end
How does this work? What does this mean? What is a prototype chain, anyway? Dearest reader: it extremely does not matter. No one cares. I would have to stare at this for ten minutes to even begin to explain it. Every line is oozing with subtlety. To be honest, even though I describe this series as “from scratch”, this is one of the very few things that I copy/pasted wholesale from an earlier game. I know this does the bare minimum I need and I absolutely do not want to waste time reinventing it incorrectly. To drive that point home: I wrote collision detection from scratch, but I copy/pasted this. (But if you really want to know, I’ll explain it in an appendix.)
Feel free to copy/paste mine, if you like. You can also find a number of tiny Lua object systems floating around online, but with tokens at a premium, I wanted something microscopic. This basically does constructors, inheritance, and nothing else.
(Oh, I don’t think I mentioned, but the -- prefix indicates a Lua comment. Comments are ignored by the computer and tend to contain notes that are helpful for humans to follow. They don’t count against the PICO-8 token limit, but they do count against the total size limit, alas.)
The upshot is that I can now write stuff like this:
 1local vec = obj:extend{}
 2
 3function vec:init(x, y)
 4    self.x = x or 0
 5    self.y = y or 0
 6end
 7
 8function vec:__add(v)
 9    return vec(self.x + v.x, self.y + v.y)
10end
11
12function vec:__sub(v)
13    return vec(self.x - v.x, self.y - v.y)
14end
15
16function vec:iadd(v)
17    self.x += v.x
18    self.y += v.y
19end
This creates a… well, terminology is tricky, but I’ll call it a type while doing air-quotes and glancing behind me to see if any Haskell programmers are listening. (It’s not much like the notion of a type in many other languages, but it’s the closest I’m going to get.) Now I can combine an x- and y-coordinate together as a single object, a single thing, without having to juggle them separately. I’m calling that kind of thing a vec, short for vector, the name mathematicians give to a set of coordinates. (More or less. That’s not quite right, but don’t worry about it yet.)
After the above incantation, I can create a vec by calling it like a function. Note that the arguments ultimately arrive in vec:init, loosely called a constructor, which stores them in self.x and self.y — where self is the vec being created.
1-- this is example code, not part of the game
2local a = vec(1, 2)
3print("x = ", a.x, " y = ", a.y)  -- x = 1 y = 2
That iadd thing is a method, a special function that I can call on a vec. It’s like every vec carries around its own little bag of functions anywhere it appears — and since they’re specific to vec, I don’t have to worry about reusing names. (In fact, reusing names can be very helpful, as we’ll see later!)
The name iadd is (very!) short for “in-place add”, suggesting that the first vector adds the second vector to itself rather than creating a new third vector. That’s something I expect to be doing a lot, and making a method for it saves me some precious tokens.
1-- example code
2local v = vec(1, 2)
3local w = vec(3, 4)
4v:iadd(w)
5print("x = ", v.x, " y = ", v.y)  -- x = 4 y = 6
Finally, those funny __add and __sub methods are special to Lua (if enchanted correctly, which is part of what the obj gobbledygook does) — they let me use + and - on my vecs just like they were numbers.
1-- example code
2local q = vec(1, 2)
3local r = vec(3, 4)
4local s = q + r
5print("x = ", s.x, " y = ", s.y)  -- x = 4 y = 6
This is the core idea of objects. A vec has some data — x and y — and some code — for adding another vec to itself. If I later discover some new thing I want a vec to be able to do, I can add another method here, and it’ll be available on every vec throughout my game. I can repeat myself a little bit less, and I can keep these related ideas together, separate from everything else.
Get the basic jist? I hope so, because I’ve really gotta get a move on here.
Objectifying Star Anise
Now that I have a way to define objects, I can turn Star Anise into one.
 1function b2n(b)
 2    return b and 1 or 0
 3end
 4
 5local t = 0
 6local player
 7
 8local anise_stand = {1, 2, 17, 18, 33, 34}
 9local anise_jump = {3, 2, 17, 18, 19, 35}
10local anise = obj:extend{
11    move = vec(),
12    left = false,
13}
14
15function anise:init(pos)
16    self.pos = pos
17end
18
19function anise:update()
20    if self.move.x > 0 then
21        self.left = false
22    elseif self.move.x < 0 then
23        self.left = true
24    end
25
26    self.pos:iadd(self.move)
27end
28
29function anise:draw()
30    local pose = anise_stand
31    if (self.move.x ~= 0 or self.move.y ~= 0) and t % 8 < 4 then
32        pose = anise_jump
33    end
34    local y = self.pos.y
35    local x0 = self.pos.x
36    local dx = 8
37    if self.left then
38        dx = -8
39        x0 += 8
40    end
41    local x = x0
42    for i = 1, #pose do
43        spr(pose[i], x, y, 1, 1, self.left)
44        if i % 2 == 0 then
45            x = x0
46            y += 8
47        else
48            x += dx
49        end
50    end
51end
52
53function _init()
54    player = anise(vec(64, 64))
55end
56
57function _update()
58    t += 1
59    t %= 120
60    player.move = vec(
61        b2n(btn(➡️)) - b2n(btn(⬅️)),
62        b2n(btn(⬇️)) - b2n(btn(⬆️)))
63    player:update()
64end
65
66function _draw()
67    cls()
68    player:draw()
69end
What a mouthful! But for the most part, this is the same code as before, just rearranged. For example, the new anise:draw() method has basically been cut and pasted from my old _draw() — all except the cls() call, since that has nothing to do with drawing Star Anise.
I’ve combined the px and py variables into a single vector, pos (short for “position”), which I now have to refer to as self.pos — that’s so PICO-8 knows whose pos I’m talking about. After all, it’s theoretically possible for me to create more than one Star Anise now. I won’t, but PICO-8 doesn’t know that!
A Star Anise object is created and assigned to player when the game starts, and then _update() calls player:update() and _draw() calls player:draw() to get the same effects as before.
I did make one moderately dramatic change in this code. The wordy code I had for reading buttons has become much more compact and inscrutable, and the moving variable is gone. A big part of the reason for this is that I consider Star Anise’s movement to be part of himself, but reading input to be part of the game, so I wanted to split them up. That means moving is a bit awkward, since I previously updated it as part of reading input. Instead, I’ve turned Star Anise’s movement into another vector, which I set in _update() using this mouthful:
1-- top-level
2function b2n(b)
3    return b and 1 or 0
4end
5
6-- in _update()
7    player.move = vec(
8        b2n(btn(➡️)) - b2n(btn(⬅️)),
9        b2n(btn(⬇️)) - b2n(btn(⬆️)))
The b2n() function turns a button into a number, and I only use it here. It turns true into 1 and false into 0. Think of it as measuring “how much” the button is held down, from 0 to 1, except of course there can’t be any answer in the middle.
Unpacking that a bit further, b2n(btn(➡️)) - b2n(btn(⬅️)) means “how much we’re holding right, minus how much we’re holding left”. If the player is only holding the right button, that’s 1 - 0 = 1. If they’re only holding the left button, that’s 0 - 1 = -1. If they’re holding both or neither, that’s 0. The results are the same as before, but the code is smaller.
Once Star Anise’s move is set, the rest works similarly to before: I update left based on horizontal movement (but leave it alone when there isn’t anyway), I alter his position (now using :iadd()), and I use the walk animation when he’s moving at all. And that’s it!
From one to many
I like to use the term “actor” to refer to a distinct thing in the game world; it conjures a charming and concrete image of various characters performing on a stage. I think I picked it up from the Doom source code. “Entity” is more common and is used heavily in Unity, but can be confused with an “entity–component–system” setup, which Unity also supports. And then there are heretics who refer to game things as “objects” even though that’s also a programming term.
This code is a fine start, but it’s not quite what I want. There’s nothing here actually called an actor, for starters. My setup still only works for Star Anise!
I’d better fix that. The notion of an “actor” is pretty vague, so a generic actor won’t do much by itself, but it’s nice to define one as a template for how I expect real actors to work.
 1local actor = obj:extend{}
 2
 3function actor:init(pos)
 4    self.pos = pos
 5end
 6
 7function actor:update()
 8end
 9
10function actor:draw()
11end
How does a blank actor update or draw itself? By doing nothing.
(I do assume that every actor has a position; this may not necessarily be the case in games with very broad ideas about what an “actor” is, but it’s reasonable enough for my purposes.)
Now, to link this with Star Anise, I’ll have anise inherit from actor. That means he’ll become a specialized kind of actor, and in particular, all the methods on actor will also appear on anise. You may notice that anise was previously a specialized kind of obj (like actor and vec) — in fact, the only reason I can call vec(x, y) like a function is that it inherits some magic stuff from obj. Surprise!
1local anise = actor:extend{
I can now delete anise:init(), since it’s identical to actor:init(). I still have anise:update() and anise:draw(), which override the methods on actor, so those don’t need changing.
Everything still only works for Star Anise, but I’m getting closer! I only need one more change. Instead of having only player, I will make a list of actors.
 1-- at the top
 2local actors = {}
 3
 4function _init()
 5    player = anise(vec(64, 64))
 6    add(actors, player)
 7end
 8
 9function _update()
10    -- ...mostly same as before...
11    for actor in all(actors) do
12        actor:update()
13    end
14end
15
16function _draw()
17    cls()
18    for actor in all(actors) do
19        actor:draw()
20    end
21end
This does pretty much what it reads like. The add() function, specific to PICO-8, adds an item to the end of a list. The all() function, also specific to PICO-8, helps go through a list. And the for blocks mean, for each thing in this list, run this code.
Now, at last, I have something that could work for actors other than Star Anise. All I need to do is define them and add them to the actors list, and they’ll automatically be updated and drawn, just like him!
Admittedly, this hasn’t gotten me anywhere concrete. The game still plays exactly the same as it did when I started. I’m betting that I’ll eventually have more than one actor, though, so I might as well lay the groundwork for that now while it’s easy. It doesn’t take much effort, and I find that if I give myself little early inroads like this, it feels like less of a slog to later come back and expand on the ideas. This is the sort of thing I meant by more structure revealing itself — once I have one actor, a natural next step is to allow for several actors.
Preparing for collision detection
I’ve put it off long enough. I can’t avoid it any longer. But it’s complicated enough to deserve its own post, so I don’t quite want to do it yet.
Instead, I’ll write as much code as possible except for the actual collision detection. There’s a bit more work to do to plug it in.
For example: what am I going to collide with? The only thing in the universe, currently, is Star Anise himself. It would be nice to have, say, some ground. And that’s a great excuse to toodle around a bit in the sprite editor.
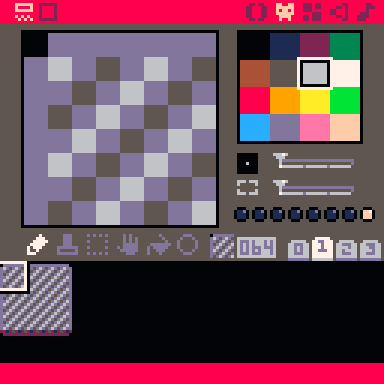
I went through several iterations before landing on this. Star Anise lives on a moon, so that was my guiding principle. The moon is gray and dusty and pitted, so at first I tried drawing a tile with tiny craters in it. Unfortunately, that was a busy mess to look at when tiled, and I didn’t think I’d have enough tile space for having different variants of tiles. I’m already using 9 tiles here just to have neat edges.
And so I landed on this simple pattern with just enough texture to be reminiscent of something, which is all you really need with low-res sprite art. It worked out well enough to survive, nearly unchanged, all the way to the final game. It was inspired by a vague memory of Starbound’s moondust tiles, which I was pretty sure had diagonal striping, though I didn’t actually look at them to be sure.
You may notice I drew these on the second tab of sprites. I want to be able to find tiles quickly when drawing maps, so I thought I’d put “terrain” on a dedicated tab and reserve the first one for Star Anise, other actors, special effects, and other less-common tiles. That turned out to be a good idea.
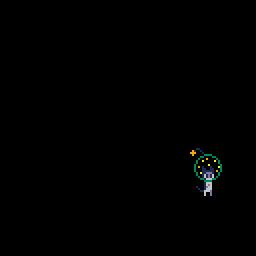
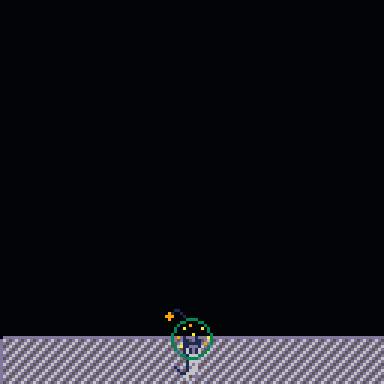
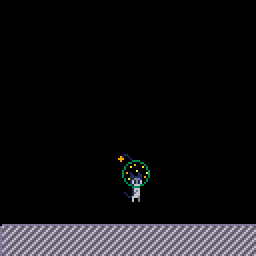
You may also notice that one of those dots on the middle right is lit up. How mysterious! We’ll get to that next time.
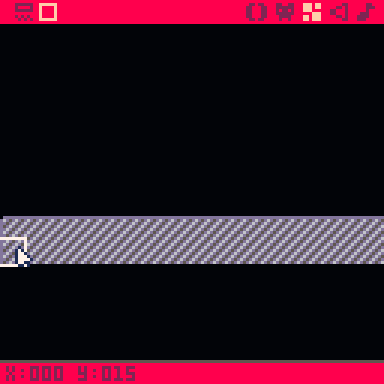
With a few simple tiles drawn, I can sprinkle a couple in the map tab. I know I want Metroid-style discrete screens, so I’m not worried about camera scrolling yet; the top-left corner (16×16 tiles) is enough to play with for now.
I draw two rows of tiles at the bottom of that screen. It’s a little hard to gauge since the toolbar and status bar get in the way, but the bottom row of the screen will be at y = 15. You can also hold Spacebar to get a grid, with squares indicating every half-screen.
Finally, to make this appear in the game, I need only ask PICO-8 to draw the map before I draw actors on top of it.
1function _draw()
2    cls()
3    map(0, 0, 0, 0, 32, 32)
4    for actor in all(actors) do
5        actor:draw()
6    end
7end
The PICO-8 map() function takes (at least) six arguments: the top-left corner of the map to start drawing from, measured in tiles; the top-left corner on the screen to draw to, measured in pixels; and the width/height of the rectangle to draw from the map, measured in tiles. This will draw a 32×32 block of tiles from the top-left corner of the map to the top-left corner of the screen.
Of course, with no collision detection, those tiles are nothing more than background pixels, and the game treats them as such.
No problem. I can fix that. Sort of.
Not quite collision detection
I’m not going into collision detection yet, but I can give you a taste, to give you an idea of the goals.
The core of it comes down to this line, from the end of anise:update().
1 self.pos:iadd(self.move)
That moves Star Anise by one pixel in each direction the player is holding. What I want to do is stop him when he hits something solid.
Hm, sounds hard. Let’s think for a moment about a simpler problem: how can I stop him falling through the ground, in the dumbest way possible?
The ground is flat, and it takes up the bottow two rows of tiles. That means its top edge is 14 tiles, or 112 pixels, below the top of the screen. Thus, Star Anise should not be able to move below that line.
But wait! Star Anise’s position is a single point at his top left, not even inside his helmet. What I really want is for his feet to not pass below that line, and the bottom of his feet is three tiles (24 pixels) below his position. Thus, his position should not pass below y = 112 - 24 = 88.
That sounds doable.
1    self.pos:iadd(self.move)
2    if self.pos.y > 88 then
3        self.pos.y = 88
4    end
And sure enough, it works!
This isn’t going to get us very far, of course. He still walks through the air, he can still walk off the screen, and if I change the terrain then the code won’t be right any more. I’m also pretty sure I didn’t actually write this in practice. But hopefully it gives you the teeniest idea of the problem we’re going to solve next time.
Part 2: Collision → (coming soon!)
Appendix: the Lua object model
Really, really, really quickly, here’s how that obj snippet works.
Lua’s primary data structure is the table. It can be used to make ordered lists of things, as I did above with actors, but it can also be used for arbitrary mappings. I can assign some value to a particular key, then quickly look that key up again later. Kind of like a Rolodex.
1local lunekos = {
2    anise = "star anise is the best",
3    purrl = "purrl is very lovely",
4}
5print(lunekos['anise'])
Note that the values (and keys!) don’t have to be strings; they can be anything you like, even other tables. But for string keys, you can do something special:
1print(lunekos.anise) -- same as above
Everywhere you see a dot (or colon) used in Lua, that’s actually looking up a string in a table.
With me so far? Hope so.
Any Lua table can also be assigned a metatable, which is another table full of various magic stuff that affects the first table’s behavior. Most of the magic stuff takes the form of a special key, starting with two underscores, whose value is a function that will be called in particular circumstances. That function is then called a metamethod. (There’s a whole section on this in the Lua book, and a summary of metamethods on the Lua wiki.)
One common use for metamethods is to make normal Lua operators work on tables. For example, you can make a table that can be called like a function by providing the __call metamethod.
 1local t = {
 2    stuff = 5678,
 3}
 4local meta = {
 5    -- this is just a regular table key with a function for its value
 6    __call = function(tbl)
 7        print("my stuff is", tbl['stuff'])
 8    end,
 9}
10setmetatable(t, meta)
11t()  -- my stuff is 5678
12t['stuff'] = "yoinky"
13t()  -- my stuff is yoinky
One especially useful metamethod is __index, which is called when you try to read a key from the table, but the key doesn’t exist.
 1local counts = {
 2    apples = 5,
 3    bananas = 3,
 4}
 5setmetatable(counts, {
 6    __index = function(tbl, key)
 7        return 0
 8    end,
 9})
10print(counts.bananas)  -- 3
11print(counts.mangoes)  -- 0
12print(counts.apples)  -- 5
Instead of a function, __index can also be another (third!) table, in which case the key will be looked up in that table instead. And if that table has a metatable with an __index, Lua will follow that too, and keep on going until it gets an answer.
This is essentially what’s called prototypical inheritance, as seen in JavaScript (and more subtly in Python): an object consists of its own values plus a prototype, and if code tries to fetch something from the object that doesn’t exist, the prototype is checked instead. Since the prototype might have its own prototype, the whole sequence is called the prototype chain.
That’s all you need to know to follow the obj snippet, so here it is again.
 1function nop(...) return ... end
 2
 3local obj = {init = nop}
 4obj.__index = obj
 5
 6function obj:__call(...)
 7    local o = setmetatable({}, self)
 8    return o, o:init(...)
 9end
10
11-- subclassing
12function obj:extend(proto)
13    proto = proto or {}
14
15    -- copy meta values, since lua doesn't walk the prototype chain to find them
16    for k, v in pairs(self) do
17        if sub(k, 1, 2) == "__" then
18            proto[k] = v
19        end
20    end
21
22    proto.__index = proto
23    proto.__super = self
24
25    return setmetatable(proto, self)
26end
The idea is that types are used both as metatables and prototypes — they are always their own __index. At first, we have only obj, which looks like this:
1local obj = {
2    init = nop,
3    __index = obj,
4    __call = function() ... end,
5    extend = function() ... end,
6}
Now we use obj:extend{} to create a new type. Follow along and see what happens. Lua only looks for metamethods like __call directly in the metatable and ignores __index, so I copy them into the new prototype. Then I make the prototype its own __index, as with obj, and also remember the “superclass” as __super (though I never end up using it). Finally I set the “superclass” as the prototype’s metatable.
(Oh, by the way: in Lua, if you call a function with only a single table or string literal as its argument, you can leave off the parentheses. So foo{} just means foo({}).)
That produces something like the following, noting that this is not quite real Lua syntax:
1local vec = {
2    __index = vec,
3    __super = obj,
4    __call = obj.__call,
5
6    METATABLE = obj,
7}
Remember this syntax?
1function vec:init(x, y)
2    self.x = x or 0
3    self.y = y or 0
4end
That is exactly equivalent to:
1vec.init = function(self, x, y)
2    self.x = x or 0
3    self.y = y or 0
4end
So after all is said and done, we have:
 1local vec = {
 2    __index = vec,
 3    __super = obj,
 4    __call = obj.__call,
 5
 6    init = function() ... end,
 7    __add = function() ... end,
 8    __sub = function() ... end,
 9    iadd = function() ... end,
10
11    METATABLE = obj,
12}
Now for the magic part. When I call vec(), Lua checks the metatable. (The __call in the main table does nothing!) The metatable is obj, which does have a __call, so Lua calls that function and inserts vec as the first argument. Then obj.__call creates an empty table, assigns self (which is the first argument, so vec) as the empty table’s metatable, and calls the new table’s init method.
Ah, but the new table is empty, so it doesn’t have an init method. No problem: it has a metatable with an __index, so Lua consults that instead. The metatable’s __index is vec, and vec does contain an init, so that’s what gets called. (If there were no vec.init, then Lua would see that vec also has a metatable with an __index, and continued along. That’s why I didn’t need an anise.init.)
That’s also why defining vec:__add works — it puts the __add metamethod into vec, which becomes the metatable for all vector objects, thus automatically making + work on them.
That’s all there is to it. It’s possible to get much more elaborate with this in a number of ways, but this is the bare minimum — and it could still be trimmed down further.
Note that you can’t actually call obj itself. Pop quiz: why not?