
 notepad
![[process]](https://eev.ee/theme/images/category-process.png)
This is a series about Star Anise Chronicles: Cheezball Rising, an expansive adventure game about my cat for the Game Boy Color. Follow along as I struggle to make something with this bleeding-edge console!
GitHub has intermittent prebuilt ROMs, or you can get them a week early on Patreon if you pledge $4. More details in the README!
In this issue, I figure out how to draw a sprite. This part was hard.
Previously: figuring out how to put literally anything on the goddamn screen.
Next: the remaining bits necessary to have something game-like.
Recap
Welcome back! I’ve started cobbling together a Pygments lexer for RGBDS’s assembly flavor, so hopefully the code blocks are more readable, and will become moreso over time.
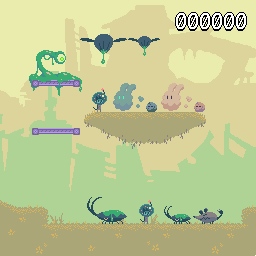
When I left off last time, I had… um… this.

This is all on the background layer, which I mentioned before is a fixed grid of 8×8 tiles.
For anything that moves around freely, like the player, I need to use the object layer. So that’s an obvious place to go next.
Now, if you remember, I can define tiles by just writing to video RAM, and I define palettes with a goofy system involving writing them one byte at a time to the same magic address. You might expect defining objects to do some third completely different thing, and you’d be right!
Defining an object
Objects are defined in their own little chunk of RAM called OAM, for object attribute memory. They’re also made up of tiles, but each tile can be positioned at an arbitrary point on the screen.
OAM starts at $fe00 and each object takes four bytes — the y-coordinate, the x-coordinate, the tile number, and some flags — for a total of 160 bytes. The coordinates are offset such that (8, 16) is the top-left of the screen, which both allows all zeroes to mean “no object” and allows for objects to be drawn partially offscreen.
Here’s the fun part: I can’t write directly to OAM? I guess??? Come to think of it, I don’t think the manual explicitly says I can’t, but it’s strongly implied. Hmm. I’ll look into that. But I didn’t at the time, so I’ll continue under the assumption that the following nonsense is necessary.
Because I “can’t” write directly, I need to use some shenanigans. First, I need something to write! This is an Anise game, so let’s go for Anise.
I’m on my laptop at this point without access to the source code for the LÖVE Anise game I started, so I have to rustle up a screenshot I took.
Wait a second.
Even on the Game Boy Color, tiles are defined with two bits per pixel. That means an 8×8 tile has a maximum of four colors. For objects, the first color is transparent, so I really have three colors — which is exactly why most Game Boy Color protagonists have a main color, an outline/shadow color, and a highlight color.
Let’s check out that Anise in more detail.

Hm yes okay that’s more than three colors. I guess I’m going to need to draw some new sprites from scratch, somehow.
In the meantime, I optimistically notice that Star Anise’s body only uses three colors, and it’s 8×7! I could make a tile out of that! I painstakingly copy the pixels into a block of those backticks, which you can kinda see is his body if you squint a bit:
 1SECTION "Sprites", ROM0
 2ANISE_SPRITE:
 3    dw `00000000
 4    dw `00001333
 5    dw `00001323
 6    dw `10001233
 7    dw `01001333
 8    dw `00113332
 9    dw `00003002
10    dw `00003002
The dw notation isn’t an opcode; it tells the assembler to put two literal bytes of data in the final ROM. A word of data. (Each row of a tile is two bytes, remember.)
If you think about this too hard, you start to realize that both the data and code are just bytes, everything is arbitrary, and true meaning is found only in the way we perceive things rather than in the things themselves.
Note I didn’t specify an exact address for this section, so the linker will figure out somewhere to put it and make sure all the labels are right at the end.
Now I load this into tilespace, back in my main code:
1    ; Define an object
2    ld hl, $8800
3    ld bc, ANISE_SPRITE
4    REPT 16
5    ld a, [bc]
6    ld [hl+], a
7    inc bc
8    ENDR
This copies 16 bytes, starting from the ANISE_SPRITE label, to $8800.
Why $8800, not $8000? I’m so glad you asked!
There are actually three blocks of tile space, each with enough room for 128 tiles: one at $8000, one at $8800, and one at $9000. Object tiles always use the $8000 block followed by the $8800 block, whereas background tiles can use either $8000 + $8800 or $9000 + $8800. By default, background tiles use $8000 + $8800.
All of which is to say that I got very confused reading the manual (which spends like five pages explaining the above paragraph) and put the object tiles in the wrong place. Whoops. It’s fine; this just ends up being tile 128.
In my partial defense, looking at it now, I see the manual is wrong! Bit 4 of the LCD controller register ($ff40) controls whether the background uses tiles from $8000 + $8800 (1) or $9000 + $8800 (0). The manual says that this register defaults to $83, which has bit 4 off, suggesting that background tiles use $9000 + $8800 (i.e. start at $8800), but disassembly of the boot ROM shows that it actually defaults to $91, which has bit 4 on. Thanks a lot, Nintendo!
That was quite a diversion. Here’s a chart of where the dang tiles live. Note that the block at $8800 is always shared between objects and background tiles. Oh, and on the Game Boy Color, all three blocks are twice as big thanks to the magic of banking. I’ll get to banking… much later.
1                            bit 4 ON (default)  bit 4 OFF
2                            ------------------  ---------
3$8000   obj tiles 0-127     bg tiles 0-127
4$8800   obj tiles 128-255   bg tiles 128-255    bg tiles 128-255
5$9000                                           bg tiles 0-127
Hokay. What else? I’m going to need a palette for this, and I don’t want to use that gaudy background palette. Actually, I can’t — the background and object layers have two completely separate sets of palettes.
Writing an object palette is exactly the same as writing a background palette, except with different registers.
 1    ; This should look pretty familiar
 2    ld a, %10000000
 3    ld [$ff6a], a
 4
 5    ld bc, %0000000000000000  ; transparent
 6    ld a, c
 7    ld [$ff6b], a
 8    ld a, b
 9    ld [$ff6b], a
10    ld bc, %0010110100100101  ; dark
11    ld a, c
12    ld [$ff6b], a
13    ld a, b
14    ld [$ff6b], a
15    ld bc, %0100000111001101  ; med
16    ld a, c
17    ld [$ff6b], a
18    ld a, b
19    ld [$ff6b], a
20    ld bc, %0100001000010001  ; white
21    ld a, c
22    ld [$ff6b], a
23    ld a, b
24    ld [$ff6b], a
Riveting!
I wrote out those colors by hand. The original dark color, for example, was #264a59. That uses eight bits per channel, but the Game Boy Color only supports five (a factor of 8 difference), so first I rounded each channel to the nearest 8 and got #284858. Swap the channels to get 58 48 28 and convert to binary (sans the trailing zeroes) to get 01011 01001 00101.
Note to self: probably write a macro or whatever so I can define colors like a goddamn human being. Also why am I not putting the colors in a ROM section too?
Almost there. I still need to write out those four bytes that specify the tile and where it goes. I can’t actually write them to OAM yet, so I need some scratch space in regular RAM — working RAM.
1SECTION "OAM Buffer", WRAM0[$C100]
2oam_buffer:
3    ds 4 * 40
The ds notation is another “data” variant, except it can take a size and reserves space for a whole string of data. Note that I didn’t put any actual data here — this section is in RAM, which only exists while the game is running, so there’d be nowhere to put data.
Also note that I gave an explicit address this time. The buffer has to start at an address ending in 00, for reasons that will become clear momentarily. The space from $c000 to $dfff is available as working RAM, and I chose $c100 for… reasons that will also become clear momentarily.
Now to write four bytes to it at runtime:
 1    ; Put an object on the screen
 2    ld hl, oam_buffer
 3    ; y-coord
 4    ld a, 64
 5    ld [hl+], a
 6    ; x-coord
 7    ld [hl+], a
 8    ; tile index
 9    ld a, 128
10    ld [hl+], a
11    ; attributes, including palette, which are all zero
12    ld a, %00000000
13    ld [hl+], a
(I tried writing directly to OAM on my first attempt. Nothing happened! Very exciting.)
But how to get this into OAM so it’ll actually show on-screen? For that, I need to do a DMA transfer.
DMA
DMA, or direct memory access, is one of those things the Game Boy programming manual seems to think everyone is already familiar with. It refers generally to features that allow some other hardware to access memory, without going through the CPU. In the case of the Game Boy, it’s used to copy data from working RAM to OAM. Only to OAM. It’s very specific.
Performing a DMA transfer is super easy! I write the high byte of the source address to the DMA register ($ff46), and then some magic happens, and 160 bytes from the source address appear in OAM. In other words:
1    ld a, $c1       ; copy from $c100
2    ld [$ff46], a   ; perform DMA transfer
3    ; now $c000 through $c09f have been copied into OAM!
It’s almost too good to be true! And it is. There are some wrinkles.
First, the transfer takes some time, during which I almost certainly don’t want to be doing anything else.
Second, during the transfer, the CPU can only read from “high RAM” — $ff80 and higher. Wait, uh oh.
The usual workaround here is to copy a very short function into high RAM to perform the actual transfer and wait for it to finish, then call that instead of starting a transfer directly. Well, that sounds like a pain, so I break my rule of accounting for every byte and find someone else who’s done it. Conveniently enough, that post is by the author of the small template project I’ve been glancing at.
I end up with something like the following.
 1    ; Copy the little DMA routine into high RAM
 2    ld bc, DMA_BYTECODE
 3    ld hl, $ff80
 4    ; DMA routine is 13 bytes long
 5    REPT 13
 6    ld a, [bc]
 7    inc bc
 8    ld [hl+], a
 9    ENDR
10
11; ...
12
13SECTION "DMA Bytecode", ROM0
14DMA_BYTECODE:
15    db $F5, $3E, $C1, $EA, $46, $FF, $3E, $28, $3D, $20, $FD, $F1, $D9
That’s compiled assembly, written inline as bytes. Oh boy. The original code looks like:
 1    ; start the transfer, as shown above
 2    ld a, $c1
 3    ld [$ff46], a
 4
 5    ; wait 160 cycles/microseconds, the time it takes for the
 6    ; transfer to finish; this works because 'dec' is 1 cycle
 7    ; and 'jr' is 3, for 4 cycles done 40 times
 8    ld      a, 40
 9loop:
10    dec     a
11    jr      nz, loop
12
13    ; return
14    ret
Now you can see why I used $c100 for my OAM buffer: because it’s the address this person used.
(Hm, the opcode reference I usually use seems to have all the timings multiplied by a factor of 4 without comment? Odd. The rgbds reference is correct.)
(Also, here’s a fun fact: the stack starts at $fffe and grows backwards. If it grows too big, the very first thing it’ll overwrite is this DMA routine! I bet that’ll have some fun effects.)
At this point I have a thought. (Okay, I had the thought a bit later, but it works better narratively if I have it now.) I’ve already demonstrated that the line between code and data is a bit fuzzy here. So why does this code need to be pre-assembled?
And a similar thought: why is the length hardcoded? Surely, we can do a little better. What if we shuffle things around a bit…
 1SECTION "init", ROM0[$0100]
 2    nop
 3    ; Jump to a named label instead of an address
 4    jp main
 5
 6SECTION "main", ROM0[$0150]
 7; DMA copy routine, copied into high RAM at startup.
 8; Never actually called where it is.
 9dma_copy:
10    ld a, $c1
11    ld [$ff46], a
12    ld a, 40
13.loop:
14    dec a
15    jr nz, .loop
16    ret
17dma_copy_end:
18    nop
19
20main:
21    ; ... all previous code is here now ...
22
23    ; Copy the little DMA routine into high RAM
24    ld bc, dma_copy
25    ld hl, $ff80
26    ; DMA routine is 13 bytes long
27    REPT dma_copy_end - dma_copy
28    ld a, [bc]
29    inc bc
30    ld [hl+], a
31    ENDR
This is very similar to what I just had, except that the code is left as code, and its length is computed by having another label at the end — so I’m free to edit it later if I want to. It all ends up as bytes in the ROM, so the code ends up exactly the same as writing out the bytes with db. Come to think of it, I don’t even need to hardcode the $c1 there; I could replace it with oam_buffer >> 8 and avoid repeating myself.
(I put the code at $0150 because rgbasm can’t subtract labels that appear later in the same source file — I presume because this is done by the single-pass assembler, not the linker — and it just seemed weird to have a floating section lexically before the entry point.)
I’m actually surprised that the author of the above post didn’t think to do this? Maybe it’s dirty even by assembly standards.
Timing, vblank, and some cool trickery
Okay, so, as I was writing that last section, I got really curious about whether and when I’m actually allowed to write to OAM. Or tile RAM, for that matter.
I found/consulted the Game Boy dev wiki, and the rules match what’s in the manual, albeit with a chart that makes things a little more clear.
My understanding is as follows. The LCD draws the screen one row of pixels at a time, and each row has the following steps:
-
Look through OAM to see if any sprites are on this row. OAM is inaccessible to the CPU.
-
Draw the row. OAM, VRAM, and palettes are all inaccessible.
-
Finish the row and continue on to the beginning of the next row. This takes a nonzero amount of time, called the horizontal blanking period, during which the CPU can access everything freely.
Once the LCD reaches the bottom, it continues to “draw” a number of faux rows below the bottom of the visible screen (vertical blanking), and the CPU can again do whatever it wants. Eventually it returns to the top-left corner to draw again, concluding a single frame. The entire process happens 59.7 times per second.
There’s one exception: DMA transfers can happen any time, but the LCD will simply not draw sprites during the transfer.
So I probably shouldn’t be writing to tiles and palettes willy-nilly. I suspect I got away with it because it happened in that first OAM-searching stage… and/or because I did it on emulators which are a bit more flexible than the original hardware.
In fact…

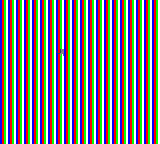
I took this screenshot by loading the ROM I have so far, pausing it, resetting it, and then advancing a single frame. This is the very first frame my game shows. If you look closely at the first row of pixels, you can see they’re actually corrupt — they’re being drawn before I’ve set up the palette! You can even see each palette entry taking effect along the row.
This is very cool. It also means my current code would not work at all on actual hardware. I should probably just turn the screen off while I’m doing setup like this.
It’s interesting that only OAM gets a special workaround in the form of a DMA transfer — I imagine because sprites move around much more often than the tileset changes — but having the LCD stop drawing sprites in the meantime is quite a limitation. Surely, you’d only want to do a DMA transfer during vblank anyway? It is much faster than copying by hand, so I’ll still take it.
All of this is to say: I’m gonna need to care about vblanks.
Incidentally, the presence of hblank is very cool and can be used for a number of neat effects, especially when combined with the Game Boy’s ability to call back into user code when the LCD reaches a specific row:
-
The GBC Zelda games use it for map scrolling. The status bar at the top is in one of the two background maps, and as soon as that finishes drawing, the game switches to the other one, which contains the world.
-
Those same games also use it for a horizontal wavy effect, both when warping around and when underwater — all they need to do is change the background layer’s x offset during each hblank!
-
The wiki points out that OAM could be written to in the middle of a screen update, thus bypassing the 40-object restriction: draw 40 objects on the top half of the screen, swap out OAM midway, and then the LCD will draw a different 40 on the bottom half!
-
I imagine you could also change palettes midway through a redraw and exceed the usual limit of 56 colors on screen at a time! No telling whether this sort of trick would work on an emulator, though.
I am very excited at the prospects here.
I’m also slightly terrified. I have a fixed amount of time between frames, and with the LCD as separate hardware, there’s no such thing as a slow frame. If I don’t finish, things go bad. And that time is measured in instructions — an ld always takes the same number of cycles! There’s no faster computer or reducing GC pressure. There’s just me. Yikes.
Back to drawing a sprite
I haven’t had a single new screenshot this entire post! This is ridiculous. All I want is to draw a thing to the screen.
I have some data in my OAM buffer. I have DMA set up. All I should need to do now is start a transfer.
1 call $ff80
And… nothing. mGBA’s memory viewer confirms everything’s in the right place, but nothing’s on the screen.
Whoops! Remember that LCD controller register, and how it defaults to $91? Well, bit 1 is whether to show objects at all, and it defaults to off. So let’s fix that.
1    ld a, %10010011  ; $91 plus bit 2
2    ld [$ff40], a
SUCCESS!
It doesn’t look like much, but it took a lot of flailing to get here, and I was overjoyed when I first saw it. The rest should be a breeze! Right?
To be continued
That doesn’t even get us all the way through commit 1b17c7, but this is already more than enough.
Next time: input, and moderately less eye-searing art!